Pam's Pantry
Welcome
Welcome to the practical eating side of this Ketogenic/LowCarb-HighFat (LCHF) way of life! We consider this a lifestyle, not a diet, and we thrive on the thought of the enormous health benefits you will experience by adopting this lifestyle with us.
Our job here is to help you know how and what you can eat so that you too can experience the awesome benefits for yourself. We hope to help many, many people like you take control of their health, and bring this to the forefront in our society by making it easier and easier to eat this way. The more people doing it, the more the foods will be readily available in grocery stores, and restaurants! This is our way of contributing to the change in the way we eat as a society!
For now, there are some things you have to search for in the grocery store, and some things you have to order in a restaurant and have them tailor for you, the following will help you eating at home and doing the grocery shopping and give you some ideas about what to order while eating out.
First you need to take another look at Keto Essentials section you read about in ‘Getting Started and start your grocery list with the items you think you’ll need that are not in your own pantry already. Then go to the Meal Planner section and select the meals you want for each day and add those ingredients to your shopping list and now you can go shopping.
We truly want to make starting as easy for you as possible, by providing you with some easy step by step guidance. Initially we won’t have vegetarian suggestions. If you are a vegetarian, then you will be used to exchanging foods out so just do the same thing here. Try to look for foods with similar macronutrient profiles. In time we will start adding vegetarian suggestions in as well.
We will be adding more and more great Keto recipes as we go along, but there are also some excellent resources out there to help you with ideas for preparing Keto Friendly dishes. You’ll be amazed at how many awesome tasty recipes there are: Check out the links below to get some more ideas:
Recipes
Keto Mayo

Many people are scared to make homemade mayonnaise, and would never think to do it themselves, but it is really simple and only takes a few minutes. This way, not only can you ensure that your ingredients are fresh with no preservatives, but you make sure you eliminate the canola oils, and sugars that are often found in store bought mayonnaise. We constantly have a jar of this in our home and even use it plain as a dip or dressing.
Ingredients:
- 2 egg yolks
- 3 Tbsp apple cider vinegar or lemon juice
- 1 Tbsp Dijon mustard
- 0.5 tsp salt
- 1 clove(s) garlic, grated or coarse salt pressed garlic (optional)
- 2/3 cup Avocado Oil
- 2/3 cup Macadamia oil…Or substitute one of the oils for Extra Virgin Olive Oil (If you prefer the more powerful olive oil flavor)
- Dash of Stevia or Xylitol (if you wish to cut the acidity at all)
Preparation:
When blending egg yolks mixture, we prefer our stick blender and a 2 cup Pyrex Glass measuring jug! There are some fairly inexpensive stick blenders here if you don’t have one and would like to order soon one. If you don’t have a stick blender you can use a food processor, or the more tiring hand whisk …….
- Add the 2 egg yolks, mustard, salt, grated garlic, and Stevia (if you are using it) to the measuring jug before adding the vinegar (or lemon juice) last as it starts to ‘cook’ the yolks.
- Then blend or whisk it until it is all nicely mixed in.Then, tip the hand blender until you see it start to create a vortex in the mixture and gradually, in a slow stream, pour in the oil while continuously blending. This prevents it from splitting and ensures the oil mixes in easily and quickly.
- If mayonnaise is still a bit thicker than you’d like, add a little more vinegar, or if you’d like it less acidic, use a little warm water. (If you prefer a less acidic version you may want to also add a little stevia or xylitol to taste.)
And Voila, you have your very own homemade mayo!!
Use leftover jars, or buy mason jars, and be creative with your very own handcrafted labeling like the one above. We’ll post some additional ways to season it in future!
Happy spreading or dipping!!!
Macronutrient Profile:
Serving Size: 1 Tablespoon (Tbsp)
Fat : 12g
Protein : 0.25g
Carbs : 0.37g
Bone Broth
 Touted for its many immunity boosting properties, Bone Broth contains many many nutrients including all of the basic minerals that are often missing in our diets like magnesium, potassium, and the all important sodium. It can help alleviate joint pain and improve gut and overall health! I even just read in Epicurious that there are shops opening up that serve bone broth to go instead of coffee stating that it has so many more energy enhancing properties than coffee!!
Bone broth (or chicken or beef stock, as we’ve been calling it for years) like our grandmothers used to make Is very inexpensive to make with leftovers and/or very cheaply obtained basic ingredients. A large pot can yield more than enough to have in the fridge to be available at any time, and enough to freeze for weeks to months at a time. Buy fresh poultry (chicken, turkey, duck, or goose) and save the leftovers from roasting it. We even bring home our leftover bones when we eat out because our favorite chicken wings are enormous and worth saving for broth! Or ask your butcher if he has any leftovers (a mix of bones with a little meat on them, such as oxtail, short ribs, or knuckle bones). Mixing the poultry in with the beef bones will ensure more nutrients including gelatin not found in marrow bones.
 Ingredients:
Ingredients for 1 added gallon of water. The bigger your pot, the more you can make so just multiply the quantities out depending on how many gallons of water your pot will hold
- 1 pound beef bones marrow bones (from your local butcher)
- 1 pound poultry bones
- 2 chicken feet for extra gelatin (optional)
- 2 large unpeeled carrots, cut into 2-inch pieces (or 6-8 small carrots)
- 2 medium leeks ends, (trim root end off), cut into 2-inch pieces
- 2 large stalks of celery
- 1 medium onions, quartered
- 1 bay leaves
- 1 teaspoon black peppercorns
- 1 tablespoon (or more) sea salt
- 2 tablespoon cider vinegar
- 1 garlic cloves
- Add Parsley and or Thyme sprig in last 30 minutes (optional)
Preparation:
- You’ll need a large stock pot to cook the broth in and a strainer to remove the pieces when it is done.
- If you are using raw bones, especially the beef bones, it improves flavor to roast them in the oven first (the poultry bones are often already roasted in our house, so we only do the beef bones and chicken feet).
- We use our broiling pan, as it has a fantastic surface that’s easy to clean.
- Roast the bones for 40 minutes at 350, they come out lovely, all browned. (If roasting the vegetables, stir halfway at 20 minutes (some people like to roast the veges as well – they say it seems to enhance the flavor).
- Remove from pan, and place in the bottom of your large stock pot..
- Pour (filtered) water over the bones and add the vinegar.
- Let sit for 20-30 minutes in the cool water. The acid helps make the nutrients in the bones more available.
- Meanwhile, chop the carrots and leeks in 2 inches, and discard the leafy tops.
- Chop the celery, and KEEP the leafy tops!
- Chop the onions in quarters and add all the vegetables (except the parsley, if using) to the pot.
- Add salt, peppercorns, bay leaves, and any additional spices, or herbs, of your choosing. We like to keep it simple without the herbs at this stage though.
- Top up the water, cover over all the vegetables and bones with filtered water, and bring the broth to a boil.
- Once it has reached a vigorous boil, reduce to a simmer and simmer for 48 hours!!
- During the first few hours of simmering, you’ll need to remove the impurities that float to the surface. A frothy/foamy layer will form and it can be easily scooped off with a big spoon. Throw this part away. I typically check it every 20 minutes for the first 2 hours to remove this. Grass-fed and healthy animals will produce much less of this than conventionally raised animals.
- During the last 30 minutes, add the parsley, if using.
- Remove from heat and let cool slightly. Strain using a fine metal strainer to remove all the bits of bone and vegetable. Make sure you get the remaining marrow out of the bones. It’s delicious an nutritious. We have found that enclosing all the ingredients in a mutton cloth bag inside the pot makes the process infinitely easier.
- When cool enough, ‘decant’ into a few separate containers, 1 or 2 depending on size to keep in the refrigerator for up to 5 days, (if you don’t eat it before that!!)
- Store the rest in the freezer.
- Enjoy and drink heated up with a few extra spices added, and a little extra sea salt if needed for an easy snack, in between meals. (an excellent way to keep you satiated and supply you with tons of nutrients!
- Or use it to make your favorite soup. We’ll get more into additional recipes at a later stage, but it’s super easy to add any leftover meats, and vegetables to your liking to heat up for a quick and easy lunch or dinner. I’ve added chicken, roasted pork, or steak – Brussel sprouts, spinach and a bit of cheese.
Voila ~ a super delicious and nutritious meal, fresh from your kitchen, and all natural instead of out of a can!
Enjoy!
Macronutrient Profile:
Serving Size: 1 Cup
Fat : 1.41g
Protein : 3.64g
Carbs : 1.1g
Cream Cheese and Olives – Fat Bomb
 My Grandmother and Mom’s recipe, always a favorite in our house as a holiday appetizer with celery.
When we started looking at Keto foods it just clicked to add this to our staple foods to keep in the fridge, and on hand!
We often make a larger batch x2 or x3 times made ahead of time. It lasts a couple weeks, and is always on hand for an easy, salty fat bomb eaten by itself with a spoon,
Or spread on celery or on spinach leaves and made into small wraps (these would be good on the go as well !)
 Ingredients:
- 8 oz (one package) Full Fat Cream Cheese (softened)
- 1 jar (5oz) Green Olives with Pimentos – chopped
- 2 Tbs juice from the jar
- Finely chopped Pecan Nuts or Walnuts and Chives
Preparation:
- Mix all the ingredients together in a small bowl. Quick and easy!
- Store in the fridge for a quick snack, spread on celery and pack in a lunch, or take it with you to a party for an appetizer you know you can eat!
- Optionally you could wait until it is chilled and firm and roll it into a sausage shape and then roll it in the chopped Pecan Nuts or Walnuts and chives…… yum!! This adds a bit of protein, and more Omega 3 fat!
- How about putting a teaspoon or so an a spinach leaf pad. Yummy cocktail bite!
Macronutrient Profile:
Serving Size: 1 Ounce (Oz)
Fat : 6.3g
Protein : 1.2g
Carbs : 2.0g
Magically Moist Almond Cake
 (Adapted from Bob’s Red Mill Recipe to make it ketogenic!)
I have adjusted the cooking time, and double it, as the instructions on the package of Stevia in Raw for Baking said you need to use half sugar, half stevia else it won’t brown.
It did brown if I used all stevia and doubled the baking time. I also felt like replacing the milk in the recipe with a Almond Milk, Coconut Cream combo would allow for this added extra baking time without it drying out. Besides, we don’t keep milk (even full cream milk) in our house…. too many carbs!
- Can serve in place of bread with a meal or soup.
- Wonderful as a snack on its own spread with butter or cream cheese!
- If you have room in your days meal plans, add some fruit and whipped cream to a small slice.
- Optional additions to mix: 1 tsp of Cinnamon, ¼ tsp Ginger, ½ cup of pecans or walnuts.
- What would you add if you were to adjust to your liking?!
- I was just thinking for a dinner party or holiday of adding a bit of rosemary to make it savory, if serving a roast. Might be delicious!
 Ingredients:
- 1 Tbsp Coconut Oil
- ¾ cup salted Butter – softened (I use salted because that’s what we always stock, but the original recipe calls for unsalted)
- 1 cup Stevia in the Raw for baking (measures cup for cup to replace sugar in recipes)
- 4 Eggs
- ¼ cup Unsweetened Almond Milk
- ¼ cup Full Cream Coconut Cream
- 1 tsp Vanilla
- 1.5 cups Almond Meal/Flour
- ½ cup Organic Coconut Flour
- ¼ tsp Salt
- 2tsp Baking Powder
- ¼ cup walnuts (optional)
- ¼ cup pecan nuts (optional)
Preparation:
- Preheat your oven to 350 degrees
- Grease a glass loaf pan, or a 9 x 13 in cake pan liberally with Coconut Oil. (This will aid in browning)
- In a large plastic mixing bowl, cream together with a hand mixer, the softened butter and Stevia. (Make sure the butter is softened or it will separate in this step.)
- Add eggs 1 at a time, beating each until fully blended.
- Add the almond milk, coconut cream, and vanilla; mix until combined. (If mixture starts separating when you are mixing in the almond milk, and coconut cream, go ahead and put the whole bowl (that’s why you wanted it in a heavy duty plastic bowl) in microwave oven for 20 -30 seconds on medium power, and then mix until creamy.
- In a separate bowl, combine flours, salt and baking powder.
- Stir dry ingredients into the wet ingredients, and beat until creamy.
- Spread batter into your greased pan, and bake for 50 – 60 minutes checking periodically to ensure not overcooking.
- Take out at 50 minutes if looking browned, and test with toothpick. Insert toothpick and remove. If no ‘crumbs’ are left sticking to the toothpick, cake is done. If there are still a few put back in for the remainder, and test again.
Macronutrient Profile:
Serving Size: 1 Slice
Fat : 29.1g
Protein : 9.4g
Carbs : 8.9g
Scalloped Cauliflower
 Ingredients:
- 2 bags frozen cauliflower (I’m using frozen today for ease, but fresh is recommended too. You’ll
- to break up head into small individual pieces.)
- 1 small white onion, finely chopped
- 1/4 cup butter (1/2 stick)
- 6 oz bag shredded sharp cheddar cheese
- 6 oz Monterey Jack Cheese
- 1/2 pint whipping cream
- Paprika
- Coriander
- Nutmeg
- Salt and Pepper
Preparation:
- Preheat oven to 350°F
- Run cool water over contents of each bag separately 1st. Separate the pieces and slightly thaw
- Prepare large casserole dish with coconut oil spray, or coat well with coconut oil. (You can use butter, but there’s butter in the layers, and I wanted a variety of flavors)
- Layer 1/2 1 bag’s contents of cauliflower in bottom of dish.
- Sprinkle Salt, Pepper, Coriander, Nutmeg, and Paprika
- Then layer with bits of onion
- Place thinly sliced “pats” of butter on top, and
- Spread 1/2 of cheddar cheese
- RepeatPour cream over top, and place dish in oven (If dish is very full, put a cookie sheet under it to prevent bubble-over in oven)
Bake 45 – 60 minutes or until bubbling
and brown.
Optional Additions: Sprinkle with thin topping of Parmesan, Almond Meal, or pre-cooked crumbled bacon in the last few minutes!
Makes 10 Servings. 3 net grams of carbohydrate per serving.
Macronutrient Profile:
1 Serving
Fat : 39.9g
Protein : 16.9g
Carbs : 3.1g
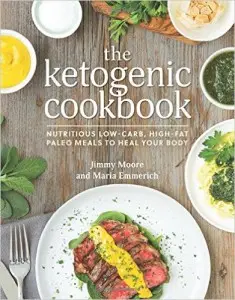
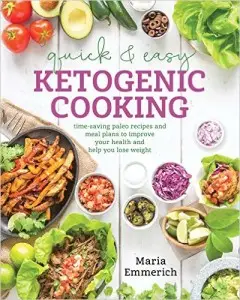
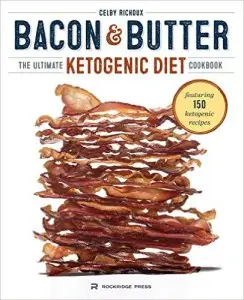
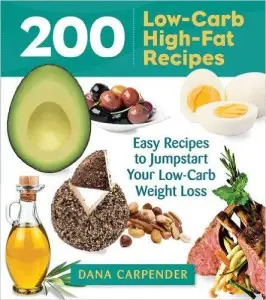
Sample Cookbooks
Related Links
Get Certified
Join our Premium Membership and complete the CME-Approved, Online Training to get Certified. Then have this badge displayed on your profile.
After that you will be required to submit a certificate for CME credits from one of our conferences every 2 years to show you are keeping up to date with the science.
Dry Farm Wines
Ketogenic Wines Delivered!
Now you can get access to wines from around the world that are lab tested to ensure they are sugar and additive free. Finally a prefect companion for anyone on a low carb or ketogenic diet.

